This article is intended to inform you of the features and uses of modern ice climbing gear. The focus is on technical waterfall ice and mixed climbing, as well as alpine routes in the mountains. For specifics on how to ice climb and the details of how to safely and correctly use the gear that I will discuss, please be sure to consult a qualified teaching source and use this article only as a reference of my personal experience and opinion. Your safety is entirely your responsibility and it is up to you to take what you read here and use it safely and discretionarily. In each section there are several examples of specific products from a variety of manufacturers. These lists are not meant to be exhaustive or comprehensive of the range of products on the market. Rather, the examples shown are chosen to display the features discussed. As with anything, you should try as many of the available products in person and decide for yourself what suits you best. Thank you to Petzl, Black Diamond, Grivel, CAMP, Simond, Yates, Mammut, Kayland, Cloudveil and Atlas for their fabulous product images.
Ice tools have gone through a dramatic phase of change in the past many years. New technology, advancing technique and evolving style have all impacted their design in a big way. In the past, people desired tools that were versatile enough to be used for both waterfall style ice climbing and for mountaineering style ice climbing. The need to be able to plunge an ice tool into snow largely dictated ice tool designs, and thus most ice tools produced were either strait shafted, or strait with a slight curve at the bottom. As roadside (waterfall) water ice climbing increased in popularity, consumers were willing to buy specialized tools made just for water ice. The resulting design features are what dominate tools today. Once people took these excellent new tools into the mountains, they realized that the modern designs climb mountains just fine, possibly even better than their predecessors. My advice is to buy ice tools that are primarily designed for climbing ice, because just about any tool can be used to climb snow.
| Classic Tools
|
|
 |
 |
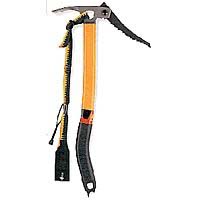
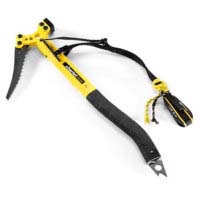
| Black Diamond X15 | Charlet Pulsar |
Modern Tool Features
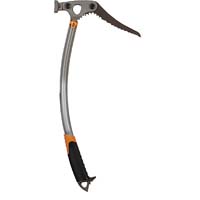
Clearance shaft: A clearance shaft is one that has a continuous arc
from the spike to the tip of the pick. The "clearance" provided from
this design allows the shaft to arc over features protruding from the ice. It
also makes climbing routes with lots of traffic easier, as pick holes on these
"picked out" routes are easier to access with a clearance shaft.
Rubberized grip & pinky hook: Improved grip texture and a pinky hook at the bottom of the tool reduce some of the effort needed to hold on. As a bonus, pinky hooks help keep your gloves dry and protect your lower fingers from getting smashed. No guarantee on those other fingers though...
Hooking teeth: Hooking teeth are small teeth located where the pick meets the head of the tool. They give the tool purchase in placements that accepts the entire pick, such as in constrictions or mushrooms.
| Various Modern Tools
|
|||
 |
 |
 |
 |
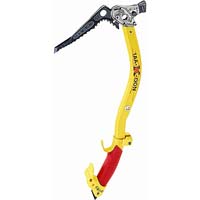
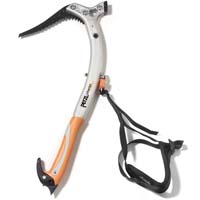
| Grivel Taa-k-oon | Petzl Quark | Black Diamond Viper | CAMP Awax |
Swing
The swing of a tool is its most important feature. The swing depends on many
things, including the shaft shape, the angle of the grip, and the weight of
the head. Most of the modern tools have a "snappy" swing that rotates
about the pinky finger. Because tools have similarly shaped shafts these days,
it is often the head weight and grip size that differentiate swings between
modern tools. There are various theories about who should swing what. A tool
that is poorly weighted for your strength will require a swing that can exhaust
you on the ice. Some people like heavy headed tools because they require fewer
swings (and thus less energy) to penetrate the ice. A disadvantage of a heavy
headed tool is that swinging one over your head takes more energy than swinging
a lighter one. As a result of this, some people prefer lighter tools because
they can swing more times without pumping out. A disadvantage to a light tool
is that you'll have to swing harder to get the pick to penetrate the ice. Again,
it is best to figure out what style works best for you and your particular strengths
by actually climbing on a variety of tools, and it may take time to get used
to the specific swing of a tool. A very rough estimation of head weight in ascending
order would be: Simond Piranha, Petzl Aztar, Grivel X-Monster, Black Diamond
Reactor, Petzl Quark, Grivel Taa-k-oon, Black Diamond Viper, Black Diamond Cobra.
Grip Size
Even with the relatively consistent shape of modern shafts, not all
shafts are created equal. Some shafts are larger in diameter, and some are smaller.
What you should look for is a shaft with a grip that fits your hand appropriately.
If the shaft is too large, you will pump out faster. Think about trying to hold
on to a large diameter pipe versus a smaller one that you can really get your
hand around. Alternatively, if the shaft is too small it can be uncomfortable
to hold on to. Think about hanging from a chopstick. Ouch. Some modern tools,
in roughly ascending hand grip size, are: Simond Piranha, CAMP Awax, Black
Diamond Viper, Grivel Top Wing, Petzl Aztar, Petzl Quark, Black Diamond Reactor,
Grivel Taa-k-oon, Black Diamond Cobra. As you can see, there are many different
tools with distinctly sized and shaped grips. It truly is best to actually climb
on a variety of tools to see what feels the best for you.
Trigger Fingers & Upper Grips
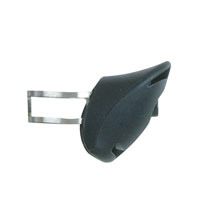
Trigger fingers and upper tool grips are gaining popularity with the
increase in leashless climbing. A trigger finger is a hook, like a pinky rest,
that separates the index finger from the others. The idea of the trigger finger
is to give more precise control and further support for the hand. Something
important to note about trigger fingers is that they need to be adjusted to
fit your hand or else you can risk injury. If too much weight is applied to
the index finger alone, it is possible to damage a tendon. Properly sizing the
trigger finger can be somewhat tricky if you use a variety of glove thicknesses
while climbing.
Upper grips are small rests that resemble the early designs of pinky hooks. They provide a small ledge above the regular grip for bumping a hand higher up the shaft or for matching both hands on one tool while leashless climbing. A solid grip higher on the tool allows you to gain more height per tool placement. This allows you to reach better ice that is higher up, or just cover more ground with fewer swings. All "Z-Handled" tools have upper grips for this reason, and now many tool manufacturers are providing upper grip add-ons for their modern ice tool lines.
| Examples |
||
 |
 |
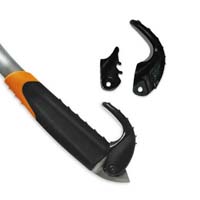 |
| A trigger finger | An upper grip | A pinky hook |
Z-handled Tools (aka Leashless tools)
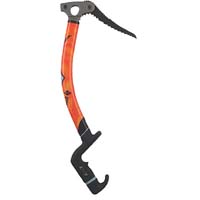
A Z-handled tool is any tool with a specialized grip that has a different
angle from the shaft. In addition, the Z-handled tools often have an upper match.
Z-Handled tools were originally designed for difficult overhanging rock and
ice climbing and were the first leashless tools. However, as these tools have
gained in popularity, their design has improved for better swing in all-around
application. While these are generally referred to as "leashless"
tools (they are rarely used with leashes), regular modern tools with pinky hooks
are also commonly used for climbing leashless.
The important features to look for in Z-handled tools depend on the desired application. If the tool is primarily going to be used for ice, your first priority will be that it swings like a normal ice tool. If the tool is mostly for drytooling and occasional ice routes, hooking performance and stability should be of top importance. Other important features are that the tool feels stable when you move from the lower grip to the upper grip, and that the pick is "quiet" (not skittery) on very small rock holds where slight movement could cause it to slip. Generally, a tool with similarly angled lower and upper grips will be more stable when you change grips. The design of the pick will also play a large role in the stability of a tool (more on this later). When choosing a Z-Handled tool it is important to consider that, while most do fine on both rock and ice, some have been optimized for rock performance specifically.
With Z-Handled tools it is important to consider the grip diameter and length. We've already discussed grip diameter, and most tools fall into one of two categories with regard to grip length: either adjustable, or so big it doesn't matter. Tools like the Black Diamond Fusion and Petzl Nomic allow the user to adjust the handle to fit their hand specifically. This can be a very nice feature, but with these ”fit like a glove” grips, it is important to be sure that the gloves you'll want to wear (thin or thick) will fit comfortably into the adjusted grip.
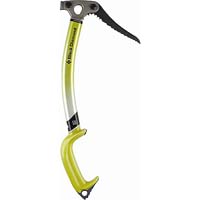
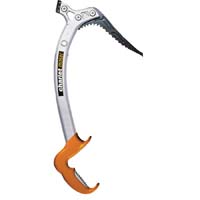
The heads of Z-handled tools vary more than any kind on the market. Some have full sized hammers, some have mini hammers, and others have no hammer at all. The benefit of having no hammer is that the head of the tool is streamlined and narrow and will thus fit into small constrictions. Not having a hammer can also be advantageous if you hit yourself in the face with your tool. The drawback is that a tool with no hammer can not generally be used on a traditionally protected mixed route unless you carry an extra hammer as a 3rd tool for pounding pitons. While this can definitely be a worthwhile trade off, many manufacturers provide an intermediate option: tools with a mini-hammer. Modular headed tools allow for setup flexibility. The Fusion, the Reactor and the Viper all have the same head design, so you could put a Viper hammer or adze onto either of the other tools. Similarly, the Quark Ergo has the same head design as the regular Quark, so you could retrofit a Quark adze to that tool.
| Various Z Handled/Leashless Tools
|
||
 |
 |
 |
| Black Diamond Fusion | Petzl Nomic | Grivel X-Monster |
 |
 |
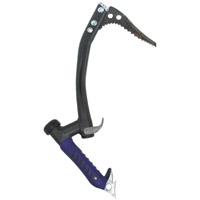 |
| Black Diamond Reactor | Petzl Quark Ergo | Simond Coyote |
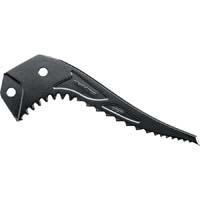
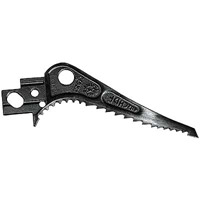
The pick is your interface with the ice, and should be your next concern after the swing. There are two CE ratings for picks out there, B type and T type. The difference is determined by a strength test, but generally speaking, B types are thinner (~3 mm) and more suited for ice, and T types are thicker (~4 mm) and are better suited for rock and rougher treatment. Of course a thin B type pick can be used (and may be better for) a hard mixed route or an abusive mountain route, but will likely wear faster than a T-type pick. Likewise, some people will climb pure ice with 4mm T type picks. The main difference between these picks while climbing ice is that a thicker pick will be more inclined to shatter the ice, which makes it more difficult to create a secure placement.
Milled & Forged
Picks are made by two methods: milling and forging. The resulting metal in a
forged pick is generally firmer, while a milled pick is softer. Some have claimed
that the softness of a milled pick is advantageous for rock work. This advantage
is accompanied by the disadvantage that milled picks need sharpening more often
than their forged cousins. Because you are really at the mercy of the manufacturer
in terms of materials, don't worry about it too much.
| Various Picks
|
|||
 |
 |
 |
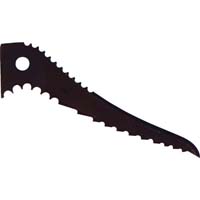 |
| Petzl Cascade (B) | Black Diamond Laser (B) | Grivel Cascade (B) | Black Diamond Fusion (T) |
Sharpening
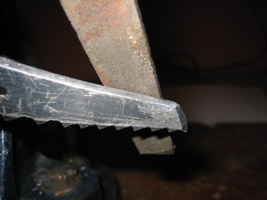
You want to keep your picks sharp for both ice and rock. In ice, they will penetrate
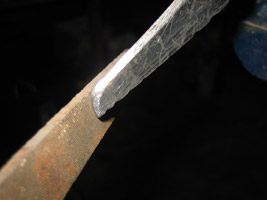
easier and shatter less. When sharpening a pick, hold the tool firmly. File
in one direction only, towards the back of the tool, while maintaining the original
angles. Work both sides evenly such that they come together in a reasonably
sharp edge. No need to get razor sharp here, as a razor sharp edge will dull
more easily. If there is any metal "hooking" down on the bottom of
the pick, flatten that off. You should now have a sharp tip and leading edge.
Now take your file and gently sharpen the top of the pick for the first few
inches. This edge bites into the ice when you lift the tool for removal. A nice
edge here (not razor sharp) will make removal easier. After seasons of filing,
you will reach the first tooth with your leading edge. At this point you'll
need to either file the tooth off or buy a new pick. Do not ever use a grinder
or sharpener that produces heat to sharpen your tools, as this can ruin the
temper of the metal and make the pick very weak.
| Sharpening a Pick |
|
 |
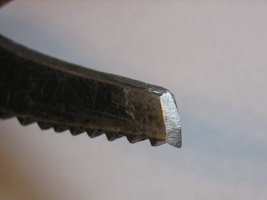 |
| A dull pick | A sharp pick |
 |
 |
| Sharpening the front | Filing the top |
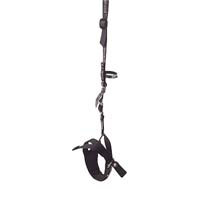
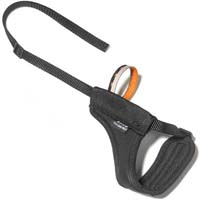
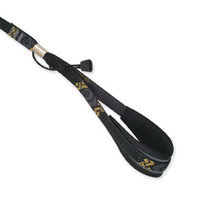
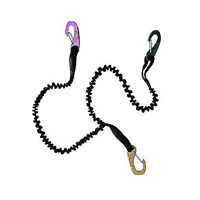
Love ‘em or hate ‘em, there are as many leash choices out there as there are tools. The most popular are the clipper style leashes. These come with a cuff that unclips from the tool. This easily lets you disconnect a hand to place screws, match tools, etc. Black Diamond makes the Android leash (clipper style) which will fit on any tool. Petzl and Grivel both make clippers that work well with their tools. When setting up your clip leashes, it is important to make sure that you can reach the head of your tool without having to unclip the leash. This will allow for easy transitions when mantling on ice or plunging in snow. Clipper leashes work well in the alpine, though there is the danger of dropping a tool because you will be completely unclipped from it at some point. To avoid this, you can either be careful, use an umbilical cord setup, or go with standard leashes. By far the most popular design for a standard leash is the lockdown. These glorified slip knots grab hold of your wrist nicely but can be easily loosened by hooking a special loop over the hammer. This style is a good and cheap alternative to clip leashes.
| Various Leash Styles
|
|||
 |
 |
 |
 |
| Clipper leash | Lockdown leash | Slider leash | Umbilical cords |
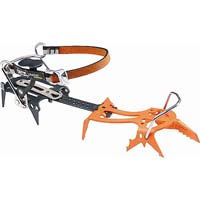
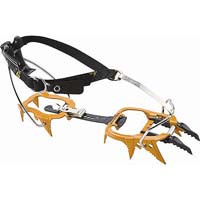
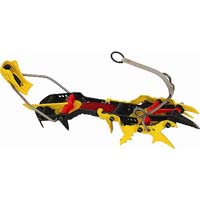
The better you can use your feet, the easier it is to climb ice. Having sharp and appropriate crampons definitely aid in this task. Modern crampons are generally lighter weight and have more aggressive points than older models. A light crampon on your foot allows easier manipulation for both kicking into the ice, and for feature style climbing (think rock climbing). Aggressive, serrated points give you more options for sticking to the ice. Many crampons are now designed with rake points which point backwards, and these are good for hooking the backside of a pillar or hooking a high edge on rock--all of which can lead to more stable body positions. Most technical ice crampons have vertical front points that look like the pick of an ice tool rather than the front points of a mountaineering crampon. The teeth on the bottom edge of the front point give a reassuring bite once engaged, and have become quite popular for both ice and rock. Often these models have configurable and replaceable front points which allows you to choose between a monopoint or a dualpoint setup. Flat front points are also gaining in popularity for climbing on pure ice because of their stable and wide platform.
| Various Water Ice & Mixed Climbing Crampons
|
||
 |
 |
 |
| Petzl Dart | Black Diamond Cyborg | Grivel Rambos |
Mono-point vs. Dual-point
Monopoints excel in the rigors of mixed climbing, where you may be required
to place all of your weight onto a narrow dime-edge. They also excel on funky
technical ice where two points might hinder adequate penetration. However, in
chandelier or aerated ice, two points are advantageous because they make more
contact and give the climber more purchase. Many people also like extra stability
of dualpoints on thunker ice. As with all gear, whether you choose mono or dual
points really boils down to personal preference. Try out different models and
see what works best for you.
Fruit Boots & Heel spurs
Modern heel spurs, usually an upside down frontpoint, began showing up with
Fruit Boots on hard mixed climbs. Fruit Boots are some sort of boot or shoe
that has a simple crampon bolted through the sole of the shoe. Fruit boots should
fit tight and be light weight for maximum precision. Using heel spurs often
removes the need for taxing figure-4 moves and thus makes it easier to climb
overhanging terrain. As a result of this, their ethics have been called into
question and many major mixed climbing competitions do not allow them.
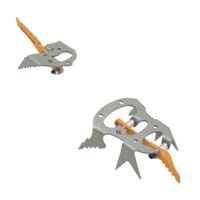
Some applications for heel spurs on pure ice include hooking your heel on the back of pillars and bracing airy traverses. It should be noted that rake points can accomplish these tasks almost as well as heel spurs, but carry less danger of poking you somewhere scandalous.
| Examples |
||
 |
 |
 |
| Fruit Boot with crampon bolted to the sole. | Fruit Boot crampons with |
A heel spur for a regular style crampon. |
Waterfall vs. Alpine
Many waterfall ice crampons are un-suited for use in the mountains. Vertical
front points that have little horizontal cross section tend to shear easily
through snow, neve and the like. Luckily, there are plenty of crampon options
that are designed with aggressive points and are well suited for both snow and
pure ice.
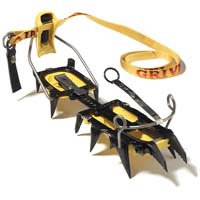
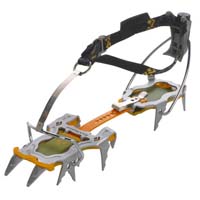
| Various Snow & Water Ice Crampons
|
||
 |
 |
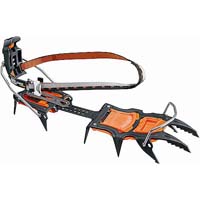 |
| Grivel G14 | Black Diamond Sabertooth Pro |
Petzl Sarken |
Sharpening
Keep your crampons sharp. It can not be emphasized enough. This means
every point from the front to the secondary to the back. Repeated filing will
eventually wear down your crampons and you will either need to buy replacement
front points or new crampons. It is worth it.You will climb more efficiently
and more confidently with sharp points. To sharpen them, start with the front
points. If they are vertical points, you should sharpen them like you would
sharpen the pick of an ice tool make sure to keep the original angles and file
towards the back. Get the tip to an actual sharp point. For the rest of the
points, and for horizontal front points (like the Sabertooths pictured above),
file the left and right edges until you have a sharp point. You should not file
on the wide side of the point. A vise can be helpful to hold the crampons still
while working on them.
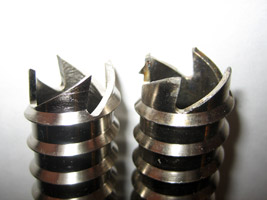
Placing an ice screw is one of the most challenging aspects of ice climbing. While a cam may take only seconds to drop in and clip to the rope, an ice screw will take much longer and require more energy to place. To make things easier on yourself, make screw sharpness a top priority. All the knob turning aids in the world won’t help you unless you can get the teeth to bite in the first place.
| Sharp & Dull Screws |
|
 |
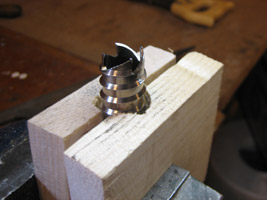 |
| A sharp screw and a dull screw | A sharpened tooth and sharpening setup |
Screw Care
Don't scratch the inside of a screw or let it rust. A scratched or rusted inside
can quickly become troublesome because ice will stick to the abnormalities and
make the screw nearly impossible to place. Applying a thin layer of WD-40 on
the hanger and inside the tube will keep your screws fresh.
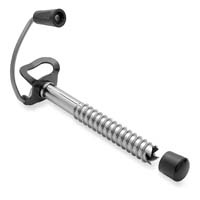
Don't dent the threads. If the threads are rough they will create more friction while twisting the screw in, and thus be harder to place. Some screws come with thread-protectors, though an ice screw protector (ex: Black Diamond Screw Up) is much easier to use. Another advantage of a screw protector is that you can leave the (hard to keep track of) screw caps at home. Eventually your screws will get dinged up and you'll need to sharpen them. There are several sources on the web about how to do this. Just start slowly and experiment with a junker.
Sharpening Articles
Sharpen
using a Dremel Tool
Black Diamond
Video using lots of files
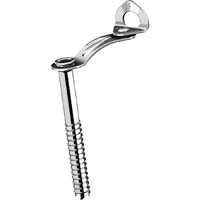
| Various Ice Screw Designs |
||
 |
 |
 |
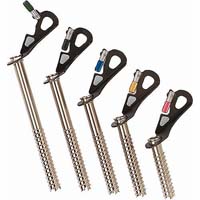
| Black Diamond Turbo Express |
Grivel 360 | Omega Pacific Ice Screw |
 |
 |
 |
| Petzl Laser Sonic | Grivel Helix | Ice Screw Protector |
Hanger Designs & Racking
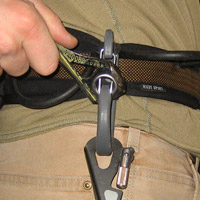
There are many different kinds of hangers out there that come on ice
screws. Nearly all new screws have widgets that spin free of the hanger and
allow you to place a screw much, much faster than without one. The main concerns
with hanger designs are how they will place and how they will rack together
on your harness. If the hangers do not have a relatively similar design, they
can be difficult to remove from your harness. If you rack too many screws on
one carabiner, you run into the danger of the screws unclipping by themselves.
This can be especially problematic when you mix hanger styles. Hangers fall
into two general styles: long hangers with an eye at the end (Turbo Express,
Omega Pacific, Laser Sonic, Helix) or small square hangers (Grivel
360). Each hanger style has it's own advantages. To place a screw, the
surface of the ice should be nearly flat through the arc that the hanger will
turn as you twist it in. On funky or featured ice, square hangers can be advantageous
because they require a smaller arc to turn and you will thus need to clear less
surface ice in order to place the screw. To somewhat alleviate the issue of
needing to clear away a large arc of ice when using the long hanger style, manufacturers
often allow a large amount of play in the connection to the screw so that the
hanger can rise above some surface irregularities as it spins. An advantage
of the long hanger screws is that you can rack many more of them onto a single
carabiner than you could with square hanger screws.
| Hanger Radius Comparison
|
 |
| Grivel 360 (light) and a Black Diamond Turbo Express (dark) |
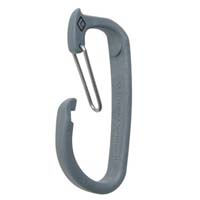
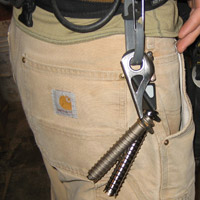
| Example Ice Screw Racking |
||
 |
 |
 |
| Black Diamond Ice Clipper | On harness | Unclipping |
Tying Off Screws
If the ice is so thin that your screw will not go all the way in, you have three
choices: 1. Use a shorter screw that can go in all the way (best), 2. Clip the
hanger if it is no further than 2 inches from the surface of the ice, or 3.
Tie something to the tube of the screw where the screw leaves the ice, and clip
to that (yikes). For the last option, it is advisable to use something strong
for your new clip in point. Clove or girth hitching webbing to the screw is
one option, but these have been shown to slip off or cut on the hanger. An alternative
is to use a nut in a makeshift way: slide the nut down on its cable, fit it
over the hanger, and snug the nut up against the tube of the screw. This provides
a much stronger and more secure tie off than the webbing.
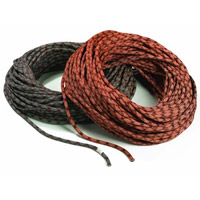
Because ice gear is generally less strong than rock gear, it is worthwhile to take greater precautions to reduce the force on your gear than you might while rock climbing. One way you can reduce the load is to use ropes with a low impact force, which will thus impart less force on your protection. Half and twin ropes have the lowest impact forces and are also useful in ice climbing because ice pitches tend to be long and it is often handy to have two ropes to rappel with. Because generally less protection is placed on ice compared to rock, long ropes (like 70 to 100 meters) are sometimes used. Dry ropes are preferable when climbing waterfalls. Sounds reasonable, yes? Well, it's due to the fact that ropes lose roughly 50% of their strength when wet. Another advantage is that nice dry treated ropes don't turn into frozen cables... as often. For top roping it is preferable to use single ropes because they are often stronger, thicker (for your partners with bad aim), and because they stretch less when you fall.
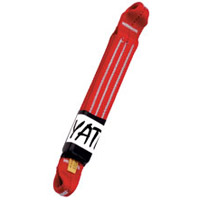
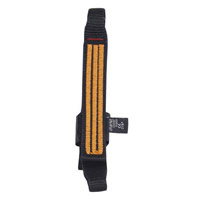
Screamers are load-limiting devices that are designed to deploy at about a 2kN load (~440lb) and keep the maximum load on the gear below 2.5kN (~500lbs). These are simply nylon or spectra slings made with special stitching designed to rip under load. If all the special stitching rips, then the fall continues on a full strength sling. It is a good idea to set up your screamers and quickdraws with the gates facing the same direction (opposite direction of how you would set the carabiners for sport climbing) because it makes clipping the rope and screw easier.
| Ropes & Screamers |
||
 |
 |
 |
| Half Ropes (8-9mm) | Yates Screamer | Petzl Screamer |
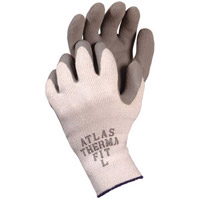
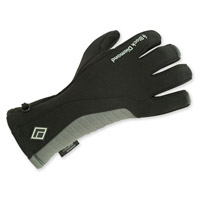
There are two types of gloves out there: leading gloves and belaying gloves. A good pair of leading (or following) gloves will be thin but have some insulation, have a grippy palm and fingers, and will not interfere with your grip on the tool. Because your leading gloves will get wet and cold while you climb, you should also have a pair of thick warm gloves for belaying (and rappelling). Ideally, these thick gloves should have a loop on the pinky so that you can clip them off to your harness while climbing. Hanging the gloves by the fingers (instead of by the wrists) helps keep snow and ice chunks from falling into them as you climb. Leather palms are also nice to protect the gloves from abrasion on rappels. Belay gloves do not need to be rad or expensive. After setting up a belay, take your lead gloves off and put them inside your jacket. This will help keep them warm and dry for the next pitch. Put your belay gloves on before bringing your partner up. On very wet climbing days, it's smart to have an extra pair or two of lead gloves in the pack.
| Various Lead Gloves
|
||
 |
 |
 |
| Atlas Therma Fit | Cloudveil Ice Floe | Black Diamond Dry Tool |
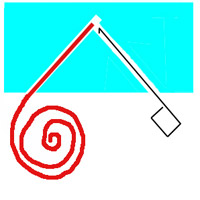
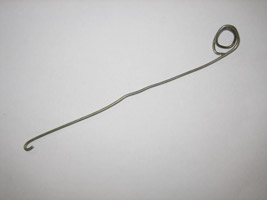
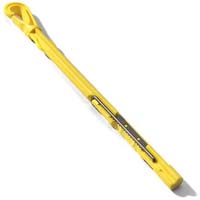
V-Threads are a way of easily setting strong anchors in ice. A V-Thread is a V shaped tunnel in the ice created by drilling two holes (with an ice screw) that connect deep in the ice. In doing this, you create an artificial ice bollard through which you can feed cord or webbing, thereby creating an anchor. To feed the cord or webbing through these tubes, you'll need a hook to pull one end though the tunnel. You can easily make one out of a sharpened coat hanger, or buy one of the many commercial options. A V-thread tool of one kind or another should be a required piece on any leader's harness. Make sure to put tape over the hook so that it doesn't poke holes in or snag your gear. The Grivel Candela (the stiff yellow one) has the added advantage of being able to push webbing into the hole, as well as clear ice from the tubes of your screws.
| V-Thread Tools |
|
 |
 |
| A V-Thread (aka Abalakov) | Wire and hook |
 |
 |
| Home made coat hanger | Stiff hook with saw blade |